Step 1 – Check for Shorts
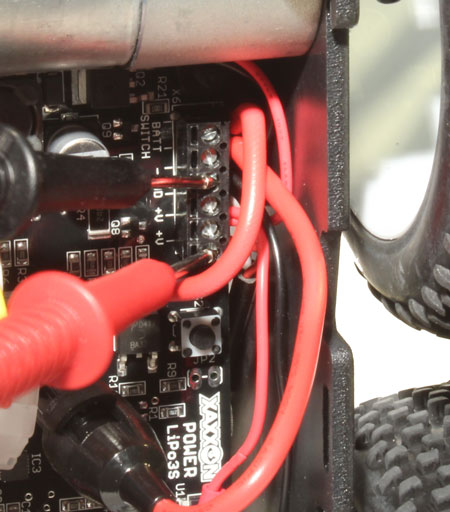
Put your multimeter in continuity mode (so it emits an audible tone if there is little to no resistance). Check the Power PCB +V and GND terminals (as shown below). There should be NO sound/continuity.
Step 2 – Check Polarity
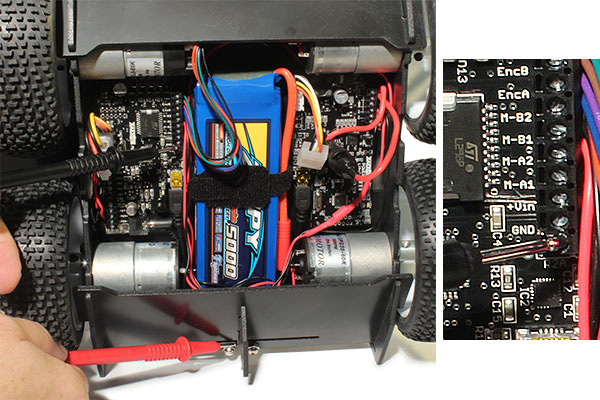
Test for continuity between GROUND charging contact on robot’s right (connected with the BLACK wire), and the “GND” terminal on the MALG PCB. There SHOULD be continuity:
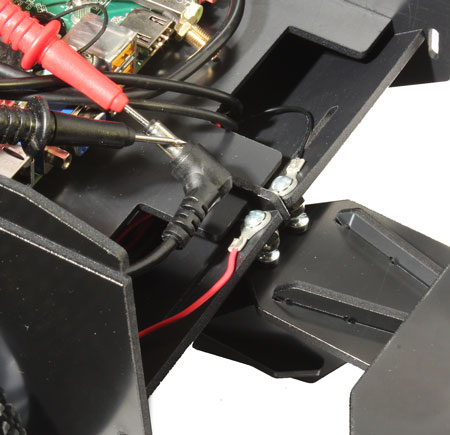
Step 3 – Check Dock Polarity
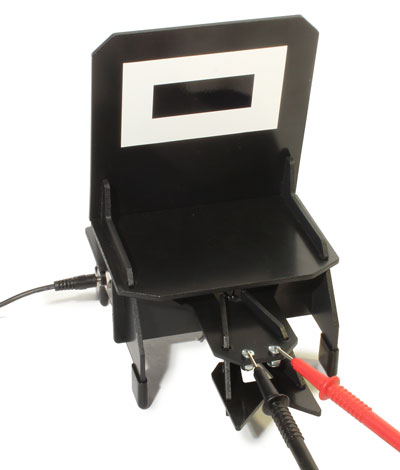
Connect the dock to wall power using the 15V wall AC/DC adapter. Check voltage with positive on robot’s left, as shown. It should read positive and be close to +15V.
Step 4 – Check Dock/Motherboard Power
MAKE SURE THERE ARE NO POWER CONNECTORS PLUGGED INTO THE MOTHERBOARD YET
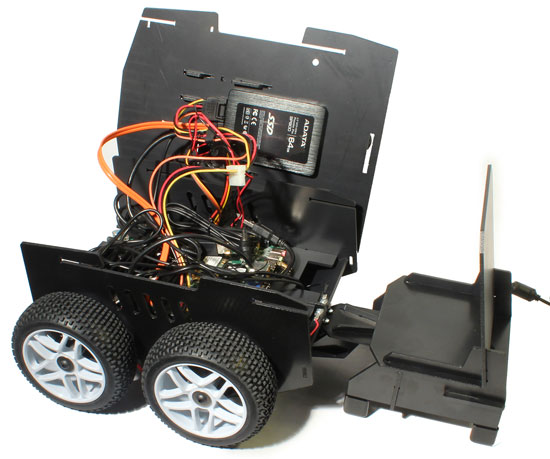
Slide the dock into position so the contacts touch:
Step 4A – Check Dock/Motherboard Power with On-Board Wide-Input Power
If your motherboard doesn’t have on-board wide-input power, and you’re using an ATX power setup (like the Xaxxon ATX power kit) skip to step 4B below.
Check the voltage of the motherboard power lead. Multimeter positive probe should be to positive on the lead (usually center if your power lead is a barrel connector).
It should read between +14 and +15 volts. If it’s negative, you have something backwards.
Step 4(B) – Check Dock/ATX Motherboard Power
If you’re using an ATX power kit that has a variable regulator, tweak the regulator dial screw until the output voltage (of the regulator) is 12V.
You’ll now need to enable the power supply by shorting the appropriate pins in the 20 or 24 pin connector (see diagram below), then check that the voltage on the +12V and +5V pins are the correct value and polarity.

Once the outputs are correct, plug the main connector into the motherboard (and plug the 4 pin CPU power into the motherboard as well, if applicable).
NEXT: Final Assembly