Step 1 – Download Package
Download the latest Oculus Prime Server package from Oculus Prime Downloads. When you unpack it, you’ll get the ‘oculusPrime’ folder. Put it somewhere in your home directory.
Step 2 – Launch Startup Script
Connect remotely to the robot desktop via a VNC client. Open a terminal window, cd into to your oculusPrime directory, and enter:
./oculusprime.sh
You should see:
OCULUS PRIME server
Use quit command to exit
Leave the terminal window open.
Step 3 – Set Preferred Browser
The application will try to launch the web browser. If the default web browser dialog pops up, set it to Google Chrome.
Step 5 – Setup and Launch
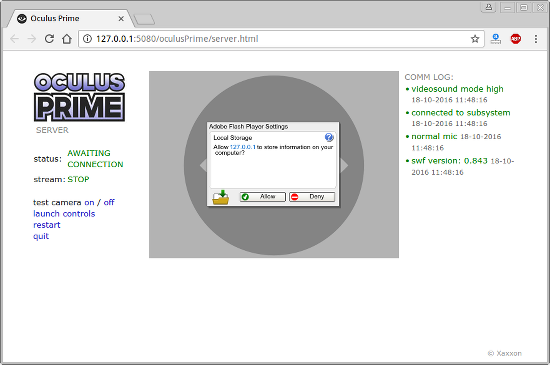
The Chrome browser should open, connected to the web page: 127.0.0.1:5080/oculusPrime/server.html. Click the ‘Allow’ button in the Flash Local Storage dialog:
Then, click the ‘test camara ON’ link, and allow permission to access the webcam when prompted. To make this setting permanent, right-click somewhere in the video box and choose ‘Settings’, then under the privacy tab check the ‘Remember’ box:

The Lifecam camera should be the only choice and automatically selected, and you should see the live video feed. Click the ‘test camera OFF’ link, and the server should be ready to go.
NEXT: Set to Auto-Start Server on Reboot