The Oculus Prime Full Version comes with a few parts detached, to protect them during shipping. Specifically, the antennas, wheels, and (if applicable) the Xtion sensor are shipped disassembled, and need to be installed as per the instructions below.
Step 1 – Install Wheels
Each wheel consists of the following parts: wheel, black steel M5 hub screw, black steel M5 set screw, large washer, aluminum wheel hub adapter, and black ABS plastic hex adapater:
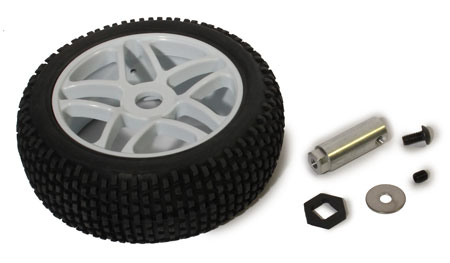
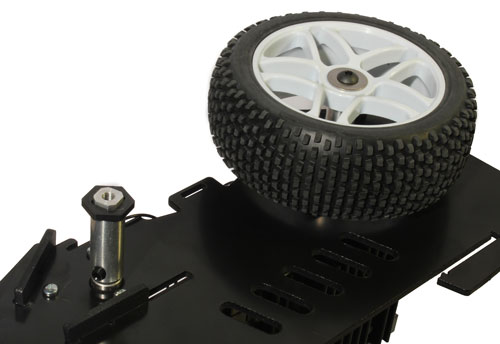
Fasten the aluminum part to the motor shaft with the set screw against the flat of the shaft. Then push the plastic hex adapter over the top of the aluminum part, and install the wheel using the screw and washer.
Step 2 – Attach Antennas (If Applicable)
If antennas are supplied, thread them onto their gold bases, which are fasted into the plastic top plate.
TIP: Should you ever wish to remove the plastic top plate for any reason, the antennas and their bases need to be removed from the top plate first. Otherwise, the ‘pigtail’ wires can easily become detached from the mini pci-e card on the motherboard, and they’re finicky to re-attach. To remove the bases from the top plate, remove the back panel, reach in with long-nose pliers and grab the base, and unscrew the nut from the top.
Step 3 – Check Cable Slack
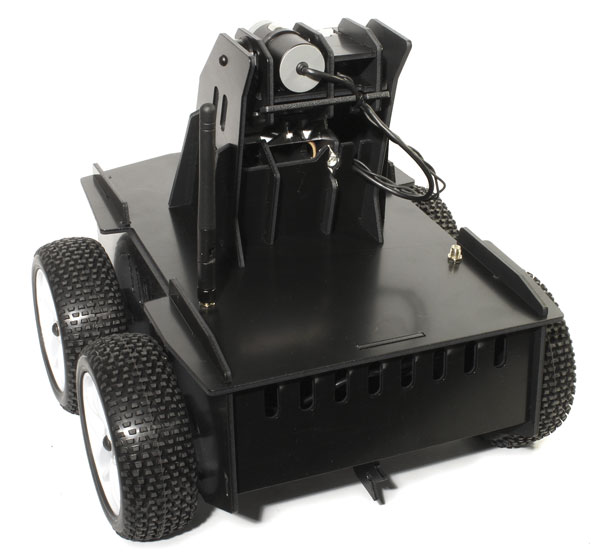
Double check that the webcam + spotlight wires have enough slack to travel freely through the full range of camera tilt motion (but not too much to be occluding the rear mirror camera view). It should look something like the photo above.
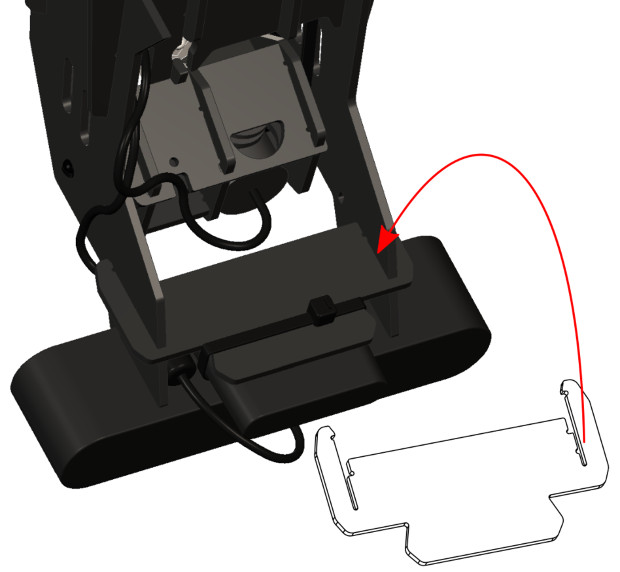
Step 4 – Mount Orbbec Sensor (If Applicable)
Mount the Orbbec Astra sensor with the cable routed forward (to keep it from blocking the rear view of the camera). To allow the ferrite chunk on the USB cable to pass thru the frame beside the sensor base, the mounting is offset slightly to one side, and there is a small ‘orientation indicator notch’ in the sensor base support frame part on the opposite side — correct orientation of the part is shown by the red arrow in each view below, pointing to where the indicator notch should be when the part is assembled.
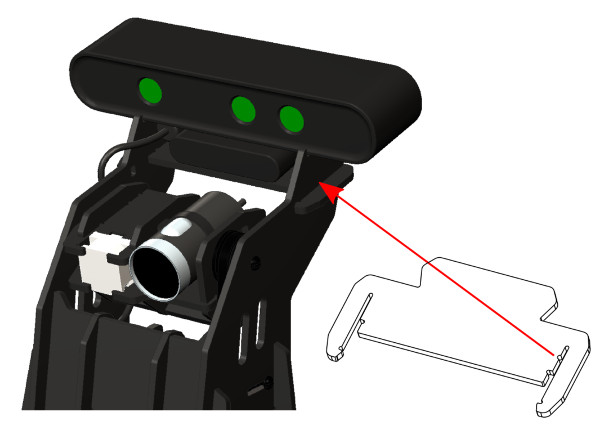
Butt the front of the camera up firmly against the small frame tabs as shown above, then use a single large zap strap secured tightly, to hold the camera to the plate.
NEXT: Connect to Wifi and Setup