The Headless Wifi Manager, included with the Oculus Prime Java Server Application, allows the robot to act as its own wifi access point, so you can connect to new wifi networks without needing to plug in a keyboard and monitor (or ethernet cable).
Set Up the Access Point Connection
Connect to Oculus Prime using VNC
Click on the Wifi icon on the upper right corner of the screen on the menu bar
Then click 'edit' – this should open a separate window of network connections
Then click the '+Add' button – this should start the new connection wizard.
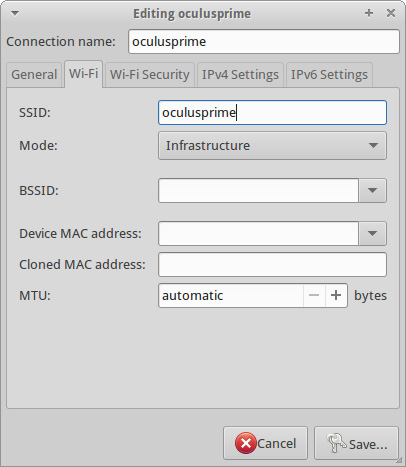
For connection type, choose ‘Wi-Fi’ then click 'Create' – this should open a blank connection dialog. Enter 'oculusprime' (case sensitive) for ‘conection name’ AND ‘ssid’:
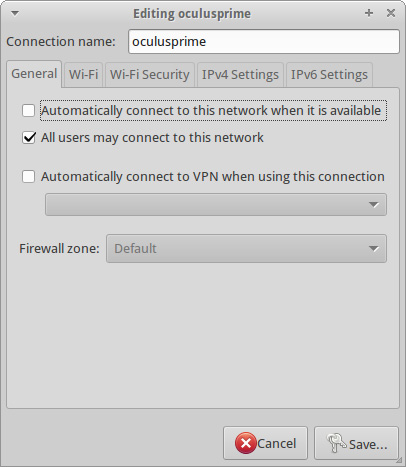
In the ‘General’ tab, disable the ‘Automatically connect’ check box:
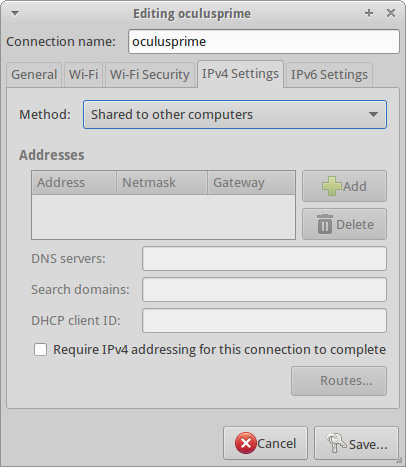
Finally, in the ‘IPv4 Settings’ tab, set the Method to ‘shared to other computers’, then click ‘Save’:
Modify the System Connection File
As root user, edit the file '/etc/NetworkManager/system-connections/oculusprime' so the line 'mode=infrastructure' is changed to 'mode=ap'
The modified file should look something like this:
[connection]
id=oculusprime
uuid=afeab870-cc23-4802-b5a6-4e85063a9bd1
type=802-11-wireless
autoconnect=false
[802-11-wireless]
ssid=oculusprime
mode=ap
[ipv6]
method=auto
[ipv4]
method=shared
Run the Wifi Manager
The Wifi Manager package is located in the 'access_point_manager' sub-folder of your oculusPrime folder. The startup script, ‘run’ needs to be run as root. Open a terminal and enter:
$ sudo /home/oculus/oculusPrime/access_point_manager/run
Modify the path to 'oculusPrime/' as necessary. The Headless Wifi Manager should now take command of wifi networking and remain connected to the connection it was already connected to. (See Using the Headless Wifi Manager for more info)
Set the Wifi Manager to Auto Start on Boot
As root, add a line to your '/etc/rc.local' file, just above the 'exit 0' line:
/home/oculus/oculusPrime/access_point_manager/run &
Modifying the path as necessary to point to the run command you entered in the step above.
Stopping the Wifi Manager
If you want to shut down the wifi manager, enter the following command (modifying the path as necessary):
$ java -jar /home/oculus/oculusPrime/access_point_manager/stop.jar
To disable auto-start on boot, delete the line from your '/etc/rc.local' file as described above.
The headless wifi manager disables the stock wifi control on the xubuntu desktop. Re-enable it by opening a terminal on the desktop, and entering the command
$ nm-applet
NEXT: SLAM Navigator Version: Install ROS