Start Navigation System
With a saved map and the navigation system turned of, go to:
'MENU > navigation > start navigation'
Wait for the system status to read 'System RUNNING' and click 'map' – you should see something like:
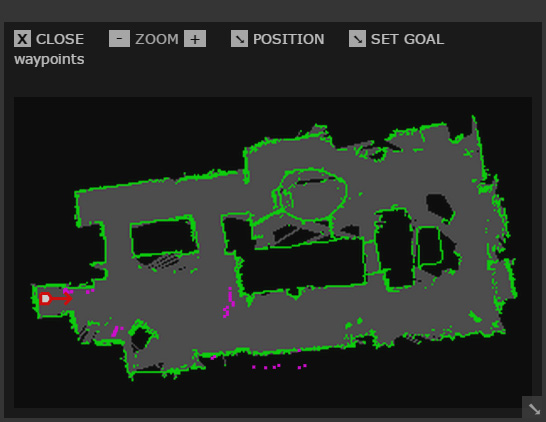
The orange and white marker shows where the system thinks Oculus Prime is – at the charging dock – and the magenta dots represent horizontal scan data from the Asus Xtion depth camera.
Define Starting Position
On start up, the system assumes that Oculus Prime is at the charging dock at the origin of the map. If it is docked, you’re OK, and can move on to the next step. If it’s not docked, you have to tell the system where it is, by clicking 'POSITION' in the map menu, and dropping a black-and-white coloured arrow using two clicks. The first click is to define the position, and the second click is to define the direction Oculus Prime is facing.
If you’re in a remote location and don’t know where Oculus Prime is on the map, turn on the camera and drive around manually a bit, and take your best guess possible.
Whenever a position arrow is dropped on the map, Oculus Prime automatically does a full rotation, to take a full scan and hone-in its position on the map.
Define Navigation Goal
When the system is running and the starting position is defined, you can drop a red-and-white arrow using 'SET GOAL' in the map menu, to define a new navigation target. Oculus Prime will then proceed to drive to the new position, and you can watch its progress on the map in real time. If it’s starting from the dock, it will do a full rotation immediately after un-docking, to take a full scan and accurately define its position before proceeding.
Set to Alert when Goal Reached
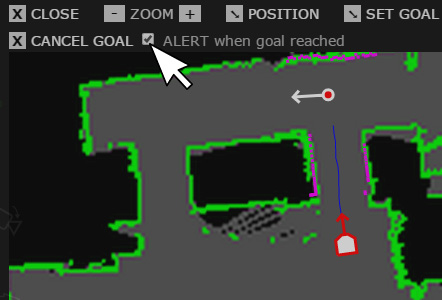
As an option, after setting a navigation goal, click the ‘alert when goal reached’ check box on the map toolbar. This will cause your web browser to pop up an alert when Oculus Prime reaches its goal (so you can move on to other tasks while waiting).
Define Waypoints
Waypoints can be defined simply by clicking 'waypoint at current position' or dropping a blue-and-white arrow using 'waypoint drop arrow' from the navigation menu, then giving the waypoint a unique name.
Waypoints are saved in a text file called 'waypoints.txt' under 'oculusPrime/conf/'
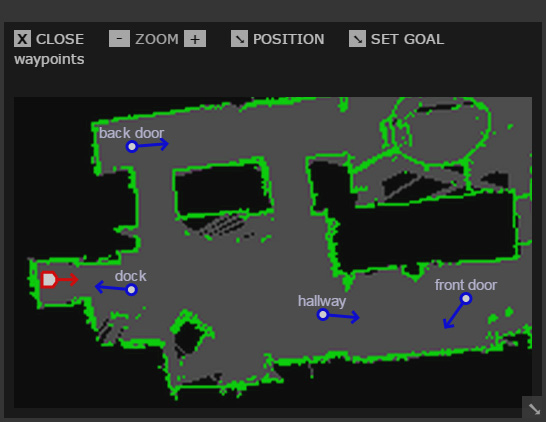
The Dock Waypoint
Make sure you create a dock waypoint and label it 'dock' – it should be near the dock and pointing at it, as if you had manually driven into the pre-auto-docking position and were about to initiate auto-docking. See below for an example, assuming the orange-and-white marker indicates Oculus Prime in the docked position:
When you use the gotodock command Oculus Prime will navigate to the dock waypoint, then shut down the navigation system and proceed to dock itself.
In the 'manage waypoints' sub-menu within the navigation menu, the dock waypoint will have the extra link ‘dock’ next to it, which sends the gotodock command:
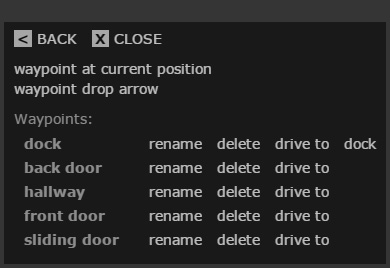
The manage waypoints menu
Patrol routes always use the dock waypoint as the last waypoint of a route, before shutting down navigation and charging until the next scheduled route.
NEXT: Defining Patrol Routes