This guide shows, in full colour detail, how to put the Oculus Prime Kit Version together. It requires some simple soldering, wiring, fastening, snapping together, and patience.
It makes it much easier to build things in the right order, so if you follow the instructions sequentially, you should be OK. The process is broken these sub-sections, in order:
Charging Dock Assembly
Camera + Light Assembly
Servo and Speaker Assembly
Upper Assembly Complete
Chassis Assembly
Chassis Wiring
Wiring Test
Final Assembly
Tools Needed
- Standard small flat screwdriver
- Precision flat screwdriver (2.0mm)
- Small Phillips screwdriver
- Precision Phillips screwdriver (#0)
- Small Needlenose Pliers
- 5/16" wrench (or small adjustable wrench)
- Soldering iron, fine tip recommended
- Solder, 1/32" recommended
- Wire stripper (18-24awg)
- Allen key, 3mm
- Allen key, 2.5mm
- Multimeter/Voltmeter
- Drill and 1/4" bit (if mounting wifi antennas)
Conventions and Assembly Tips
Wiring and Polarity
Getting the polarity right is very important in this build, otherwise you can do serious hardware damage.
RED wires pretty much always mean POSITIVE.
If you follow the instructions closely, and do the multimeter testing before hooking up power as instructed, all will be well.
Robot’s Right
This guide makes a few references to “robot’s right” when describing where to put things. So imagine you are the robot, facing forward, upside-up. Your right will be the same as robots right (this applies to building the dock as well — see diagram below for further clarification).

Snap Fit Frame Parts
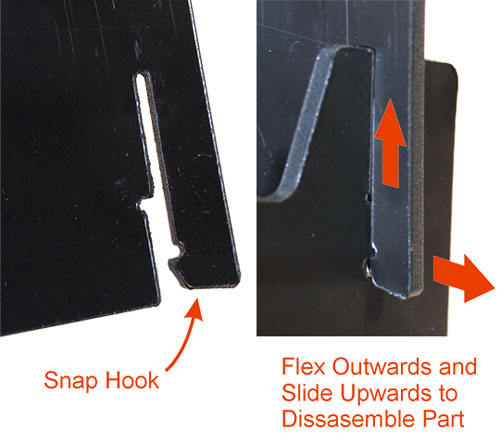
Most of the plastic parts that make up the frame of Oculus Prime are snap together. Just slide the slots together, and keep going until you feel the click. They are intended to be dis-assemble-able as well (in case you assemble it the wrong way), but it’s not quite as easy as assembling them. Flexing some of the snaps free are harder than others — for the really tough ones, you’ll have to use some force. The ABS plastic is pretty tough, don’t worry too much about breaking it. See diagram below for basic snap fit function.

Some Plastic Frame Material Has A Good Side And A Bad Side
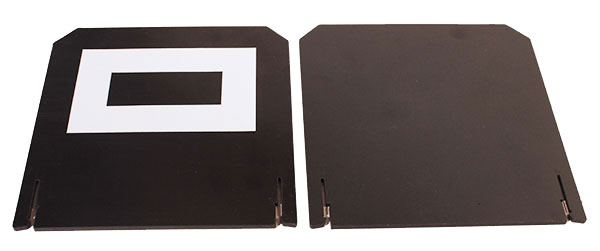
Sometimes the ABS sheet we get is a bit nicer looking on one side than the other. It’s hard to describe the difference, or show in photos, and sometimes there really isn’t any difference. One way of telling is to have a look at the dock part with the decal on it. The decal side (shown below, left) is the good side.

NEXT: Charging Dock Assembly
